Fuel Tank - Major Assignment
To commence our major assignment, we were presented with two
types of fuel tanks that as a group we were to replicate a 1:1 scale. As a
group, we choose the peanut fuel tank that we were going to complete rather
than the other fuel tank which required extra work with dips, curves and bends
within the tank. As we opted for the peanut fuel tank, we started to measure
the tank for actual dimensions, so that when we use Auto Desk Slicer to create
the 3D model, we can get it to that 1:1 scale. Once we created the template on Auto Desk Slicer, we were required to use the laser cutting machine to cut the
templates. Slowly, the laser cutter separated our fuel tank into 24 pieces,
which we had to assemble carefully, however even though it was fully assembled,
it still felt wobbly. To rectify this, we asked Gabe for access to the hot glue
gun and started to spread it on the edges and corners of the template. After
two minutes, the template began to become sturdy which enabled us to begin
forming / shaping the way we would separate the three parts of the fuel tank.
 |
| Auto Desk Slicer: 3D Model Rear View |
 |
| Auto Desk Slicer: 3D Model Front View |
 |
| Laser Cutting Machine Cutting Templates Out |
|
 |
| Templates Assembled |
 |
| Hot Glue Gun to make template sturdy |
There were many ideas and opinions from the group members on
how to cut the three sections of the fuel tank. The first opinion was to cut
the cross section of the fuel tank into three parts, as the reasoning for this
is the person who was to shape the back had a better idea of hitting both sides
however, we didn’t account for the curve and shaping in which that one person
who must complete. Fortunately, Daniel came over and advised us that the best
method of shaping this fuel tank was to separate the top and sides from each
other. Therefore, we broke the sides with the back and cut it from half between
the top and side, as this will be the most effective method splitting the work
between three as it will enable all members to make as little curves to the
edges as possible, thus making it easier to properly shape our peanut fuel
tank.
Once we agreed on the method of attacking this fuel tank, we
got paper to trace our two sides and top of the fuel tank. Then we simply
traced our paper shapes onto the metal sheet. We cut the shapes 1mm from the
lines of the shape as this will give us some space for error, so that we can
get as closely as possible to the line without taking off the shape, as we were
keeping in mind of the 1:1 scale that we had to achieve for this assignment.
 |
| Paper Shapes to Metal Sheet |
 |
| Transferring shapes to Metal Sheet |
 |
| Cutting the Shape from the Metal Sheet |
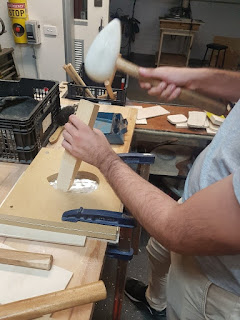
I had completed the right-hand side of the fuel tank, so I
started to shape my sheet metal by curving it with my hands around our
template, so I can create my bend. I marked out around the edges of the
template and the corner area with circles (like we did in the bowl exercise),
so that I knew what room I had to achieve the curve to the top of the fuel
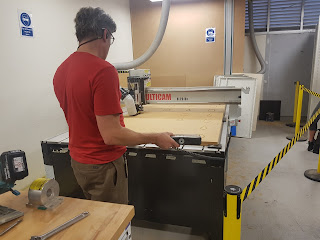
tank. One I completed that, I used the English wheel to stretch out the back,
however later did I realised this only created a problem for myself as I
stretched my back to far away from the template. To resolve this issue, I had
to shrink the sheet metal around the curve and back of the fuel tank, which in
the end fixed the shape of my side, but left teeth marks on the bottom of the
tank, which I tried to mask with the plenishing hammer.
 |
| Art of Stretching: English Wheel |
 |
| Shaping Edges |
 |
| Nearly have the shape |


Comments
Post a Comment