The Bowl
THE BOWL
This week we were required to create and shape a bowl to the
best of my abilities with the limited time and resources that were given to me.
Before we commenced our bowl, Russell taught us the theoretical aspects of
shaping of the bowl from the piece of metal sheet. The fundamental aspect that
I took from this exercise, is that when you want to add area to the sheet of
metal, it must move somewhere meaning that strategic hits with the nylon mallet
were required in shaping the bowl.
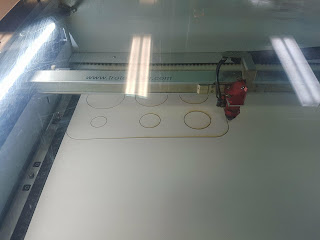
We started off at the laser printer, as we were required to laser
cut our bowl and female radius gauge template. Martin had used the machine by
putting these template within the printer and focusing on the material and
utilising as little waste when he instructs the machine to make the cut on the
material. Once we obtained these preciously accurate templates from the laser
printer, we received our sheet of metal and drawn concentric circles on the
metal sheet so that this would act as a benchmark for our hits with the nylon
mallet.
 |
| Concentric Cirlces from the Laser Printer |
Once I had my benchmarks, I separated the metal sheet with a
guillotine for the other person. We then had cut the square metal sheet into a
circle. Initially, I had used the guillotine to get as close to the outer edges
(1mm to 2mm) of my circle to save myself time. Once I used the guillotine, I
then got a pair of aviation scissors and cut carefully and neatly around the
edges of the circle. I found it incredibly difficult in cutting the piece of
metal sheet accurately with the aviation scissors as it would lead to the
offcuts to be curling around my arm which was making the task tough. As the
edges weren’t that smooth, I had to use a file to smooth out the edges.
When the edges were smooth, and my sheet of metal started to
look like a circle, it was time to put my theory into practice. With a nylon
mallet and a stump, I began to make strategic hits to the metal, with the
pointy side of the mallet hitting the outer edges of the metal, so that it was
stretching the material (thinning it out). Then I used the sand bag and other
side of the mallet to hit the second biggest circle, as I continuously started
to stretch the metal, my bowl began to take shape. However, I noticed that the
edges of my bowl started to fold, as I stretched it too much. To fix this, I
placed the sides on a flat surface and hit the sides until it was flat.
 |
| Side Profile: Female Raduis Gauge at 155r |
All this hammering with the nylon mallet had left the metal
bowl looking dented. In order to fix this, I had utilised the English wheel to
plenish my bowl and make the radius of my bowl as nice as possible. This piece
of equipment was by far the most interesting tool to utilise, as I was
fascinated how it was able to smooth the edges of the bowl and create such a
nice finish, allowing for a solid 155 bend.
 |
| Top Profile: Female Radius Gauge at 155r |
Looking forward for the next module :)


Comments
Post a Comment